Animation
Behaviors
A behavior moves, turns, scales or fades a symbol instance by itself, frame after frame, with no keyframes: a sign that wiggles, a light that pulses, an antenna that trails the head it is on. Behaviors add to what the instance's keyframes and tweens already do, so you can key the big moves and let behaviors add the life.
Add a behavior
- Select one or more symbol instances on the stage.
- Open .
- Click Add Behavior and pick one. Pointing at a name in the list says what it does.
- Set what it offers with the sliders, boxes and lists under the list. The stage shows the result as you drag.
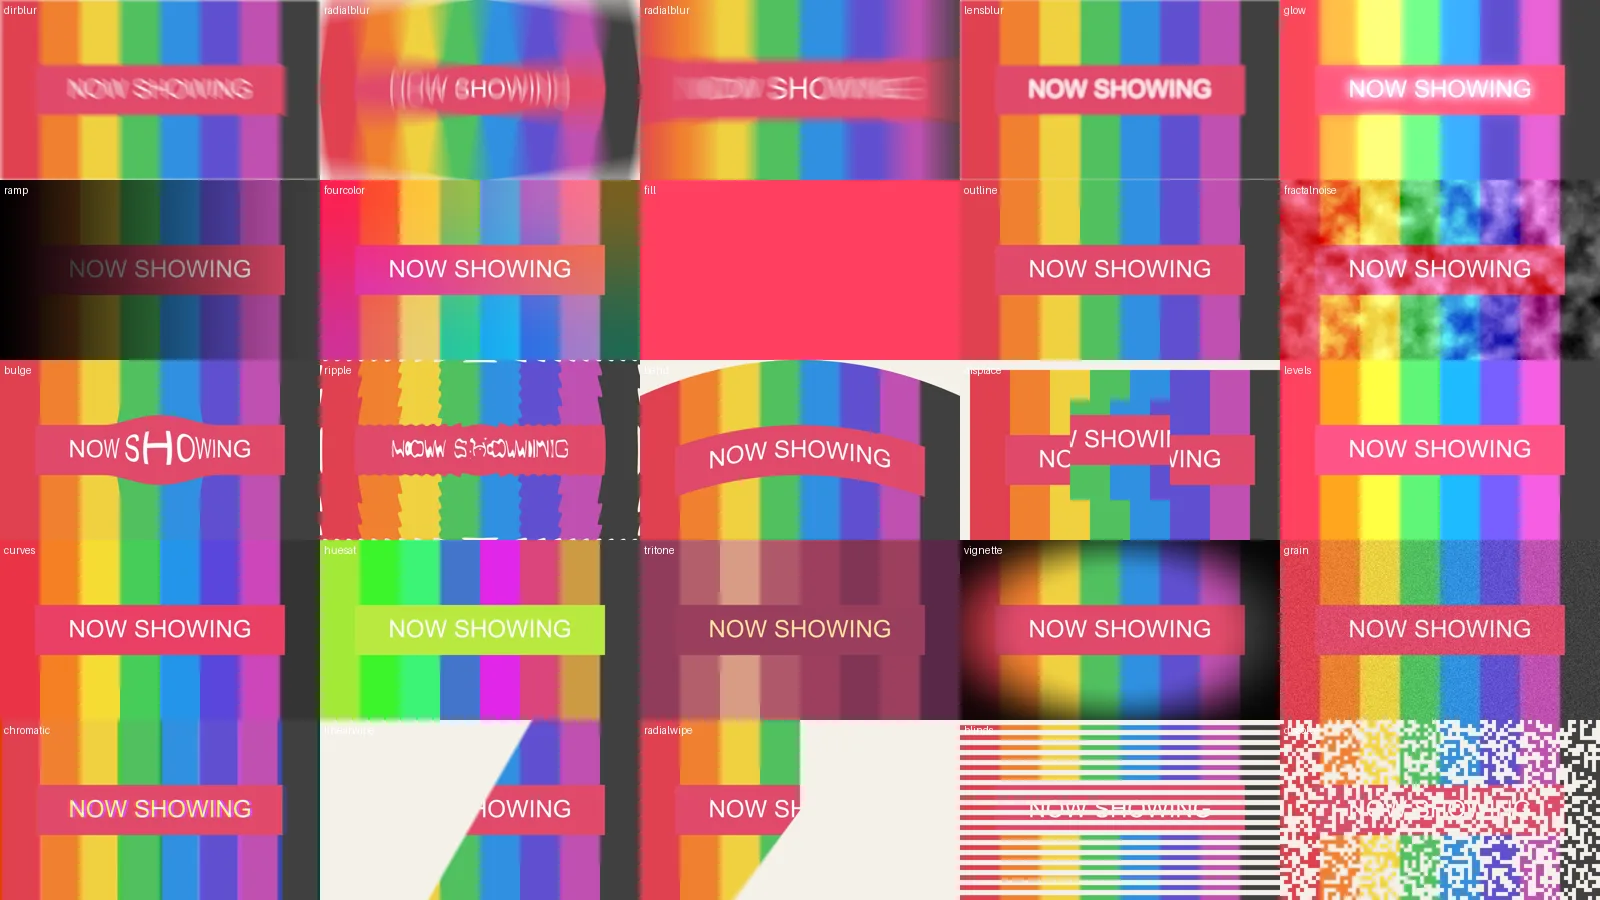
To see them move before you choose, click Add Behavior › Browse Presets.... It lists ready-made combinations (Float, Heartbeat, Swing, Flicker, Ring of Copies, Fountain and others) and then every behavior on its own, each playing on a sample star. Double-click one, or click Add to Selection, to add it; the window stays open to add another. With text selected the same command shows the letter animations, played on a sample word; with a shape selected, the shape operators, each with a still beside its name and playing on sample shapes; and on an adjustment layer, the effects, each on a sample picture (transitions and Trim Paths play from start to end so you see them move).
Play the timeline, or use Test Movie, to see the motion. Behaviors show the same way on the stage, in Test Movie and in every export.
- The box beside a behavior turns it off and on again.
- The arrows change the order behaviors apply in; Remove takes one away.
- Every change is a step you can undo. Dragging a slider is one step.
- With several instances selected, a behavior you add goes on each, and a setting you change changes on each instance that has that behavior in that place in its list.
- An instance copied to a new keyframe keeps its behaviors, and they carry on smoothly from one keyframe to the next as long as the same symbol stays in the same place on the layer.
The behaviors
| Behavior | What it does |
|---|---|
| Wiggle | Shakes the instance about at random, smoothly: its place, turn and size, as many times a second as you choose. |
| Oscillate | Swings it back and forth evenly: up and down, side to side, turning, growing or fading. |
| Spin | Turns it steadily about its transformation point. |
| Pulse | Grows and shrinks like a heartbeat. |
| Fade In and Out | Fades it in at the start of its keyframes and out at their end. |
| Blink | Makes it disappear and come back, on a beat or at random. |
| Time Remap | Says which frame of a graphic or movie clip shows, frame by frame, whatever its loop: key Frame shown from 1 to 48 over 96 frames for slow motion, hold it for a freeze, key it from high to low to run the graphic backwards, or shape it as a curve in the Motion Editor. A movie clip follows it instead of playing its own timeline, on the stage, in exports and in Test Movie, where the scripts of each frame it is taken to run as it gets there. Tick Blend between frames and, in slow motion, a frame part way between two shows the next faded in over this one, so the motion runs smooth instead of stepping. Bake leaves each frame's graphic set to Single Frame on the frame it showed (a blended frame as two). |
| Recorded Motion | A path drawn by hand with Control > Motion Sketch (see Motion Sketch), as keys a frame on how far it moves across and down. |
| Loop | Repeats the motion keyed over the first frames of its keyframes for as long as they run: round and round (a cycle), back and forth, or carrying on the way it was going at the speed it ended with. Key a bob or a step once and loop it. |
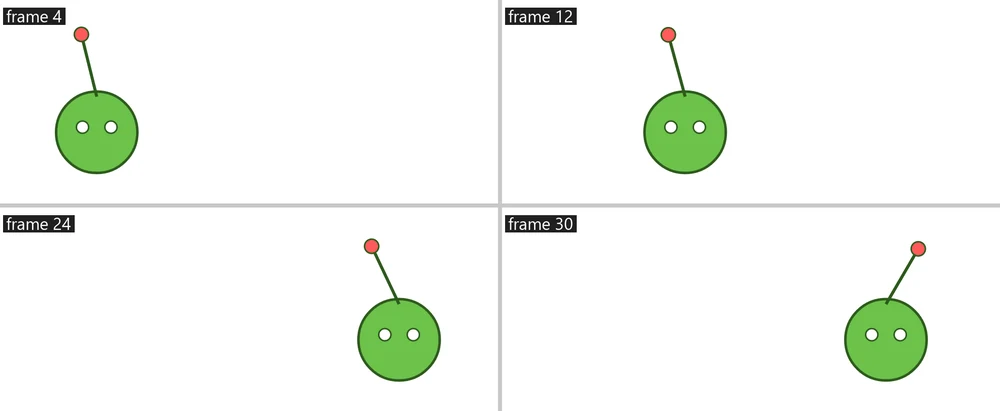
| Jiggle | Makes it sway and bounce on a spring as it is carried about, turning about its transformation point: antennas, ears, a feather, a sign on a chain. It follows the layers it is parented to as well as its own keys; say which way it points from its pivot, how far it swings, how springy and how bouncy. |
| Follow with Lag | Makes it trail its own keyed motion on a spring: it lags behind, catches up and overshoots. Use it for hair, antennas, tails and props, keyed with the part they hang from. |
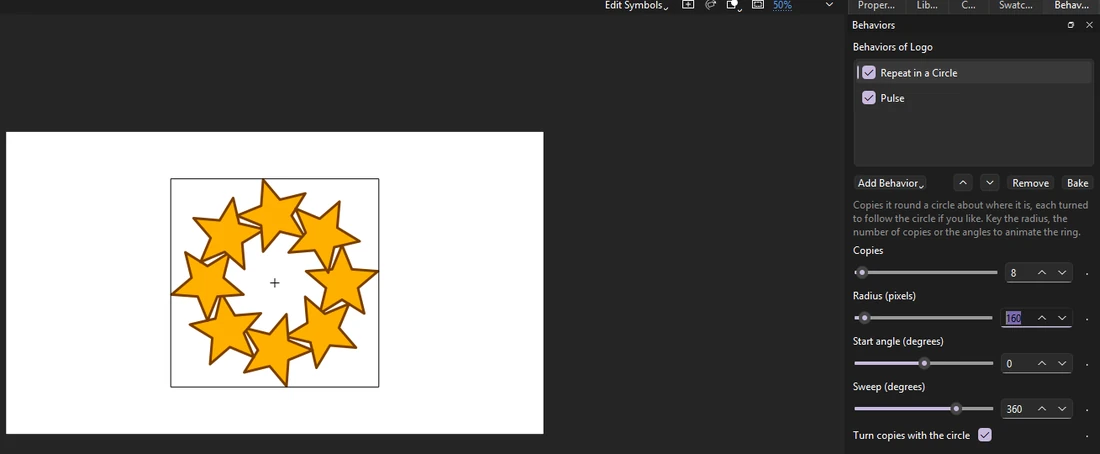
| Repeat in a Circle | Copies it round a circle about where it is, each copy turned to follow the circle if you like: the number of copies, the radius, the start angle and how far round they go. |
| Repeat in a Line or Grid | Copies it in a row, or in rows and columns, from where it is or centered on it. |
| Repeat along a Path | Copies it along the line drawn on the motion guide its layer is under, spaced evenly from one place on the line to another, each copy turned with the line if you like. Key Slide along to send the copies flowing down the line; with Wrap round off, copies that slide past an end disappear. |
| Scatter in a Shape | Copies it at random places inside a closed line drawn on the motion guide its layer is under, kept apart, turned and sized at random if you like: a field of flowers, stars in a window, a crowd in a square. The same places every frame, from the seed. |
| Follow Path | Puts it on the motion guide's line: key how far along it is, or give it a speed, and it travels the line, turned with it if you like. |
| Look At | Turns it to face another instance, chosen by its instance name: eyes that follow, a spotlight on a dancer, an arrow that points. |
| Link to Object | Moves, turns, scales or fades it as another instance does, from where each starts: a shadow under a bouncing ball, a wheel that turns as the car moves across, a needle that rises with a level. Any change can drive any other: its moving down can turn this one. Scale it by an amount, add an offset, keep it within limits, and lag it if you like. See Links. |
| Slider, Angle, Point, Color and Checkbox Control | Controls to key, each with a name, that do nothing to the instance holding them: other instances follow them with Link to Control (see Controls on a null). |
| Link to Control | Follows a control on another instance: an angle turns it, a point moves it, a slider sizes or fades it, a color tints it, a checkbox shows or hides it. |
| Link to Controller | Sets its place, turn, size or fade from a master controller's slider (see Rigs and motion), between two values. |
| Effector | Changes the copies a Repeat or Particles behavior made: each copy moves, turns, grows, fades or runs its loop on by how near it is to a point, where it is across or down, or its place in the order. Key the point or its reach to sweep the change across the copies. |
| Particles | Sends out copies as particles, born at a steady rate from a point or an area: speed and direction with a spread, gravity, turbulence, spin, size from birth to death, fading. A graphic symbol's loop can start as each particle is born. Like everything else, the same frame always shows the same particles. |
| Stagger | Runs each copy's graphic loop a few frames after the one before, in order or at random, so copies of one cycle move out of step: a crowd, a field of grass, a wave. Put it after a Repeat behavior. |
| Follow Sound | Moves it with how loud the scene's sound is: it grows, jumps, turns, shows or changes frame on the beats, falling back gently after each. Ignore the quiet parts, and nudge it a frame or two early or late to taste. For lip sync proper, see Lip sync. |
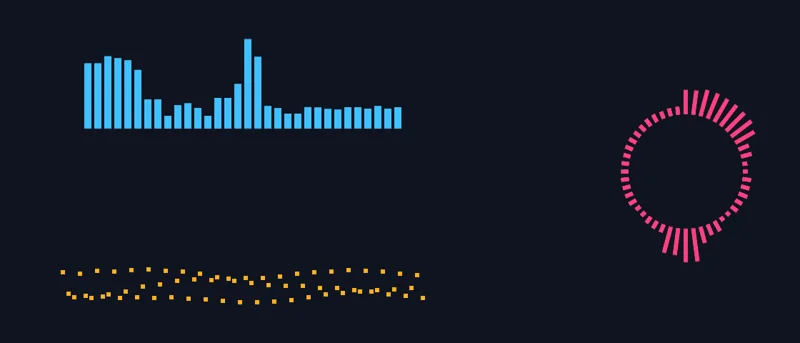
| Audio Spectrum | Copies of it as the bars of an audio spectrum, low notes on the left to high on the right (or round a circle), each growing taller, bigger or brighter with how much of the scene's sound is in its band, and falling back gently after a peak. Draw a bar with its registration point at its bottom so it grows upward. Choose which part of the range to show with Lowest band and Highest band. |
| Audio Waveform | Copies of it along the wave of the scene's sound over each frame, in a line or round a circle, like an oscilloscope. Use a small dot for a dotted line, or a short dash. |
Sixteen or more copies draw quickly: copies of a graphic or a movie clip are stamped from one picture of each frame they show, and copies with a filter, a blend mode or a color effect share one picture among those that come out the same (the same frame, color, turn and size), so a grid of glowing clips costs little more than one.
Links
Look At and Link to Object follow another instance by its instance name. Choose it from Linked to, or click Pick and then click the instance on the stage; one with no name is given one from its symbol. Esc cancels. While an instance with a link is selected, a dashed line runs from it to the instance it follows.
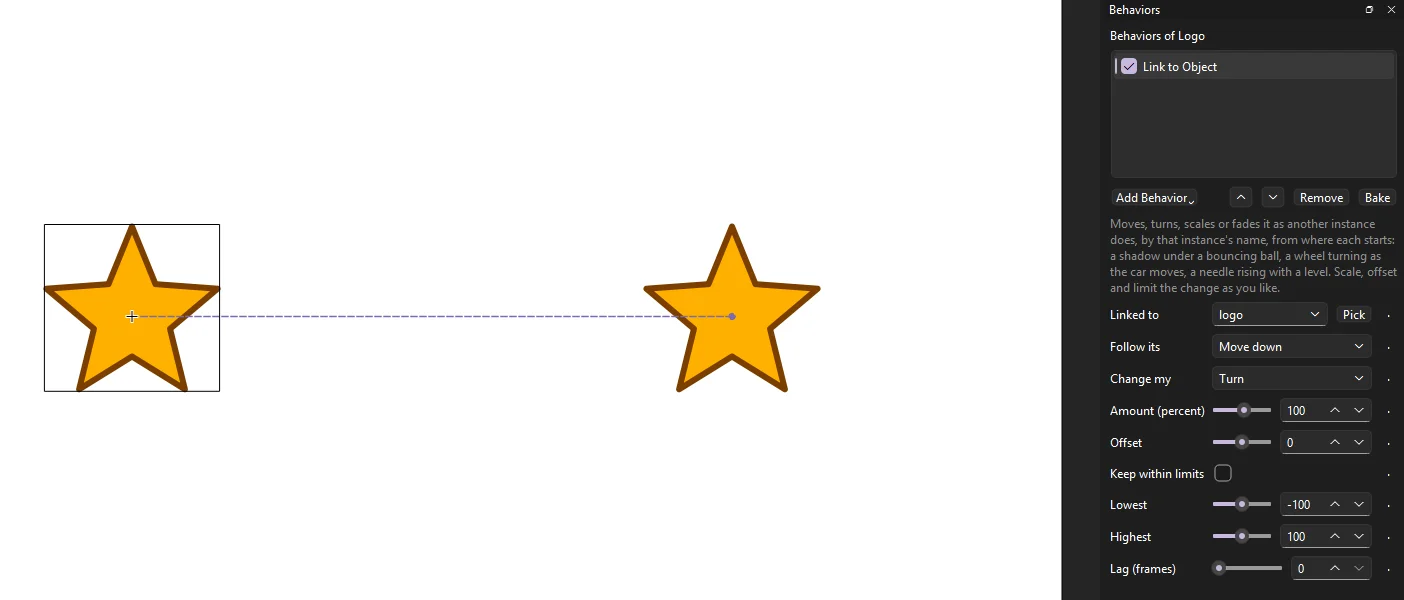
Follow its says which change to follow, and Change my what it changes here: Same for the same kind, or any of moving across, moving down, turning, size and fade. Moving is in pixels, turning in degrees, size and fade in percent. Amount scales the change, Offset adds to it, and Keep within limits holds it between Lowest and Highest: a door that opens no further than 90 degrees, however far its handle goes.
Controls on a null
When many things should move together, give the scene one place to change them from. Put controls on one instance, the "null" (a small marker on a guide layer is a good choice, as it does not show in the movie), name it, say rig, and add control behaviors to it: Slider Control, Angle Control, Point Control, Color Control and Checkbox Control. Give each a Control name and key its value over time like any setting.
Then add Link to Control to each instance that should follow, with Controls on set to rig and the control's name. Change my says what it drives: Same turns by an angle, moves by a point, tints toward a color and shows or hides by a checkbox; or pick moving across, moving down, turning, size, fade, tint or showing. Amount and Offset scale and add to it. Turn one Angle Control and every gear in the machine turns; change one Color Control and the whole title takes the new accent color.
Behaviors of your own read controls too: ctx.control("rig", "Dial") gives a number for a slider or an angle, {x, y} for a point, "#RRGGBB" for a color, and true or false for a checkbox. A behavior can tint what it moves by returning color and tint (0 to 1).
Animate the settings
Any setting can change over time. The small button at the right of a setting keys it on the frame the playhead is on:
- Move the playhead to where the change starts and click the setting's key button. It fills in (◆): the setting is keyed there.
- Move the playhead on and change the setting. A keyed setting is keyed again wherever you change it.
Between keys a number runs in a straight line from one value to the next; a choice or a checkbox holds until the next key. The button is hollow (◇) on frames between keys; clicking it there keys the setting at the value it has, and clicking a filled one takes that key away. With its last key gone, the setting keeps the value it had.
Key the radius of Repeat in a Circle from 0 to 100, say, and the copies burst out from the middle; key its start angle and the ring turns; key the number of copies and they appear one by one.
Along a path
Repeat along a Path and Follow Path use the line on a motion guide, the same guide a classic tween can follow (see Masks and guides):
- Add a guide layer above the instance's layer and draw the line on it with the Pen, Pencil or Line tool: a curve, a spiral, a closed loop.
- Drag the instance's layer under the guide layer so it becomes guided, or set its type to Guided in Layer Properties.
- Give the instance Repeat along a Path or Follow Path.
Change the line and the copies follow it. A guide with keyframes of its own changes the line over time too. Guide layers are never drawn in exports, so only the copies show.
Copies
A Repeat behavior draws the instance many times. The behaviors below it in the list then work on every copy, each in its own way: a Wiggle after Repeat in a Circle wiggles each copy differently, and Stagger sets each copy's loop apart. The copies are drawn, played and exported like the instance itself; on the stage, clicking selects the instance through its first copy.

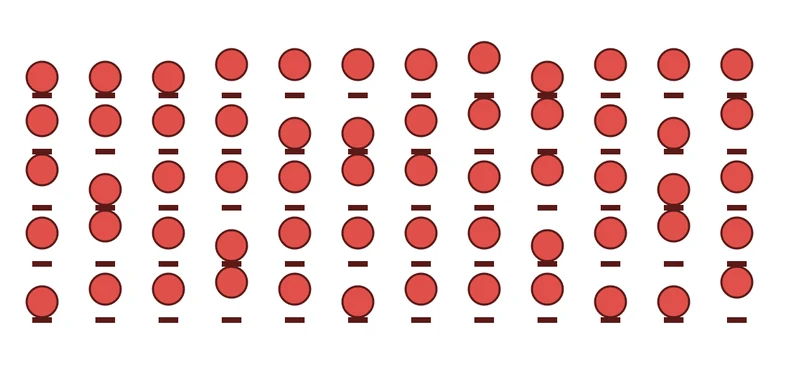

Turns and scales happen about the instance's transformation point, the same point the Free Transform tool turns it about.
Behaviors that are random (Wiggle, and Blink set to random) have a Seed. The same seed always gives the same motion, so a scene renders the same every time; New picks another seed for a different motion. Each behavior you add starts with a seed of its own, so two instances given the same behavior do not move in step.
Shape operators
Drawn shapes have operators of their own, which change their lines and outlines each frame. Select a shape (a drawing object, or a merge-drawn shape picked whole) with no symbol instance selected, and the Behaviors panel shows its operators: Add Operator offers them, and their settings key the same way.
| Operator | What it does |
|---|---|
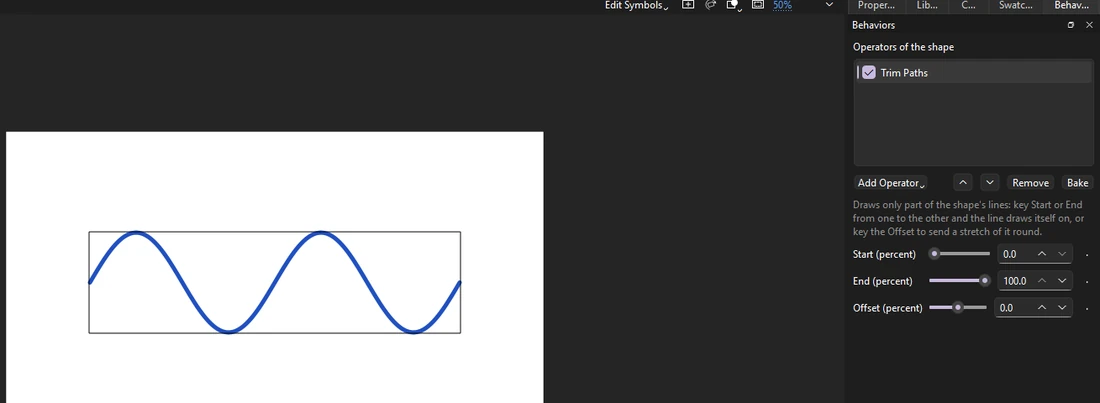
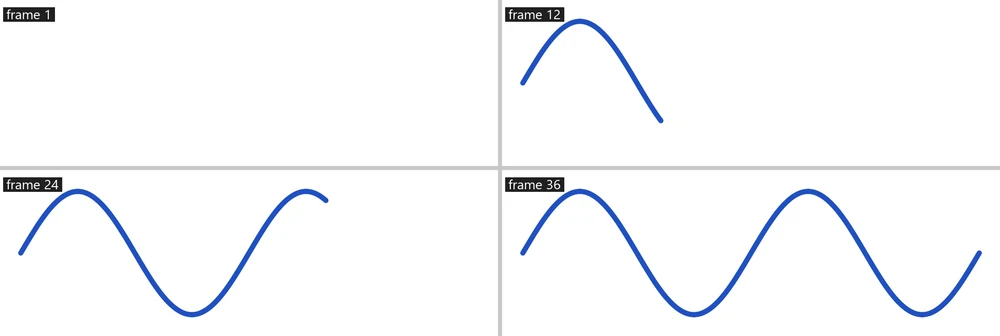
| Trim Paths | Draws only part of the shape's lines, from a start to an end along them, with an offset that slides the drawn part round. Key the End from 0 to 100 and the line draws itself on; key the Start after it and it draws itself off. Fills are left whole. |
| Wiggle Path | Shakes the outlines and lines smoothly at random: how far, how long the waves are, how fast they change. Change on whole frames only makes it boil like redrawn line work. |
| Zig-zag | Puts teeth, or smooth waves, along the outlines and lines; key the shift to make them travel. |
| Offset Path | Grows the outlines outward by so many pixels, or shrinks them with less than 0, keeping their corners; holes shrink as the shape grows. |
| Round Corners | Rounds the sharp corners, up to a radius. |
| Pucker and Bloat | Pushes the sides between the corners out from the shape's middle (bloat), or draws them in (pucker, less than 0): a square that puffs up, a star that sharpens. |
| Dashes | Cuts the shape's lines into dashes of a length with gaps between, each ended as the stroke's caps end it (round caps make rounded dashes). Key the Offset to send them marching along: a dotted route on a map, a fuse, marching ants. |
| Taper | Thins or swells the shape's lines along their length, from Start width to End width (percent of the stroke's weight), with a Wave that swells and thins them and can travel down them: a brush stroke, a tail, a rope, a pulse along a wire. A gradient stroke keeps its gradient. |
| Twist | Turns the shape about a middle point, more near the middle than at the edge, curling straight sides into a swirl. Key the Angle for a whirlpool. |
| Merge Paths | Combines the shape's outlines into one: added, the later ones cut out of the first, only where they overlap, or only where they do not (Exclude). Most useful after Repeater or Offset Path, whose copies overlap. |
| Repeater | Draws the shape again and again, each copy moved, turned and scaled from the one before: a trail, a spiral, a stack of rings. |
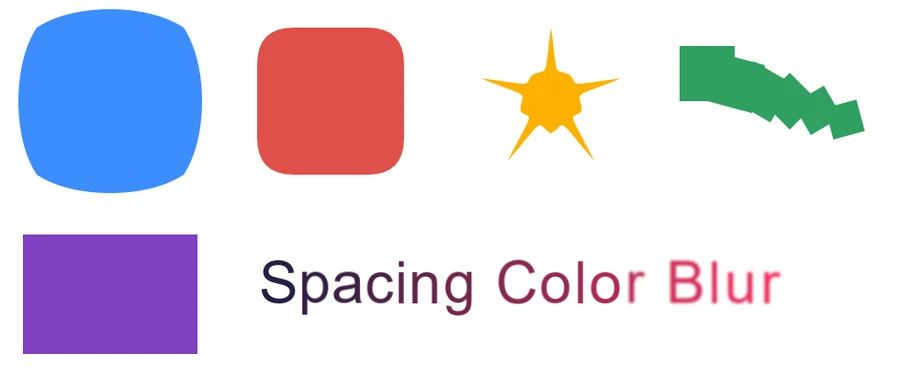
Operators keep the shape's fill and stroke as they are. Clicking on the stage finds the shape by its outline as drawn.
Letter animators
A text field's letters can move one by one while the text stays text you can edit. Select a text field (with no symbol instance or shape selected), and the Behaviors panel shows its letter animators: Add Animator offers them. Those that play by themselves count from the first frame of the keyframes the text is on.
| Animator | What it does |
|---|---|
| Typewriter | Types the text out a letter at a time, so many letters a second, after a wait if you like. |
| Cascade In | Each letter slides in from above, below, left or right, fading up, a little after the one before. |
| Bounce In | Each letter grows from nothing, past its size and back. |
| Fade by Word | The words fade in one after another. |
| Scramble | Letters flicker through random letters, digits or symbols until each settles on its own, left to right. |
| Flip In | Each letter turns in from edge-on, in depth, a little after the one before: tipped over its level line, or swung round like a door. |
| Blur In | Each letter comes into focus and fades up, a little after the one before. |
| Source Text | Changes the words the field shows: key Text to other words at other frames, for a countdown, a changing caption or a list. The letter animators after it work on the new words. |
| Text on a Path | Lays the letters along the line of the motion guide the text's layer is under, each turned with the line (or upright). Key First margin to send the text along the line; Above the line lifts it off; with Wrap round, letters that run past the end carry on from the start, otherwise they are hidden. Vertical text runs along the line too, its letters following each other down the line as they do down the column, standing as they stand in it, their tops toward where the line comes from. |
| Wiggly | Shakes each letter about on its own, smoothly at random: moving, turning, growing and fading as much as you set. Together makes them move more alike, up to all as one. |
| Wave | A wave runs through the letters, lifting and tilting them, for as long as the text shows. |
| Animate Letters | Moves, turns, sizes, fades, spaces out, colors and blurs the letters (or words, or lines) a range covers, the range's edge square, ramped, rounded or in random order. Key its Offset to sweep the change from one end of the text to the other: any effect the others do, and more. |
Animate Letters can also tip and swing letters in depth (Tip in depth, Swing in depth), drawn in perspective. Add Animator › Presets adds ready-made letter animations, each of one or more animators you can then change: Typewriter, Pop In, Slide Up, Drop In, Words Fade In, Flip In, Swing In, Blur In, Decode, Wavy Arrival and Jitter.
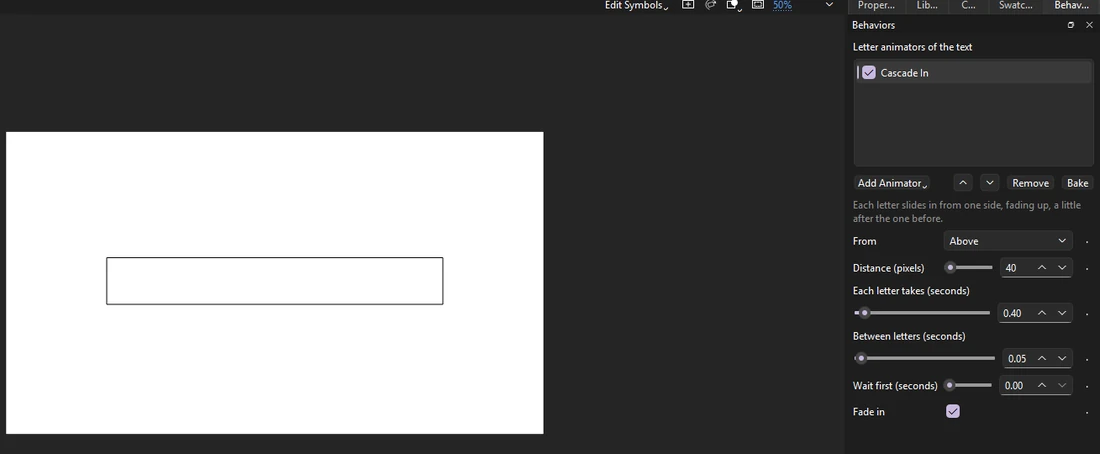
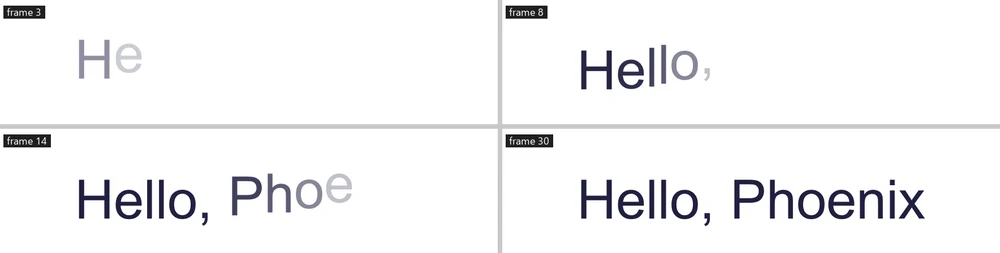
Letters turn and grow about their middles. Several animators add up: Cascade In and then Wave, say, brings the letters in and then keeps them moving.
Track mattes and adjustment layers
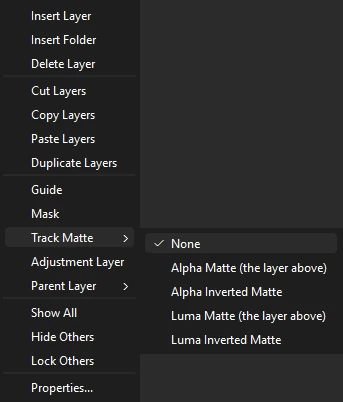
Two layer settings, on the layer's right-click menu in the timeline, change how layers combine.
- Track Matte shows a layer only through the layer just above it. An Alpha Matte shows it where the layer above has art, a Luma Matte where that art is light; the inverted ones show it everywhere else. The layer above becomes the matte and is not drawn itself. Unlike a mask, a matte can be soft (a blurred or faded shape gives a soft edge) and works while you edit, and both layers animate as usual: key the matte's art to make a reveal.
- Echo and Posterize Time... gives the layer a trail of its earlier poses (Echoes, how many frames apart, and how much of the one before each keeps) and holds each of its poses for some frames (Posterize Time: 2 for animation on twos, more for a jerky, stop-motion look), on the stage, in Test Movie and in every export.
- Motion Blur smears what moves fast on the layer along its path, as a camera would: tweens, motion paths, bones and behaviors alike, and what animates inside the layer's graphics and movie clips (a wheel spinning in its own timeline), on the stage, in Test Movie and in every export. A symbol that is stopped, or held on a frame by Time Remap, stays sharp inside. The shutter is on the Properties panel's Doc tab: Shutter is how long it stays open in degrees of a frame (180, the default, is half a frame, centered on it; 360 a whole frame), and Samples how many pictures of the layer are averaged for each frame (16 by default; more is smoother and slower to draw).
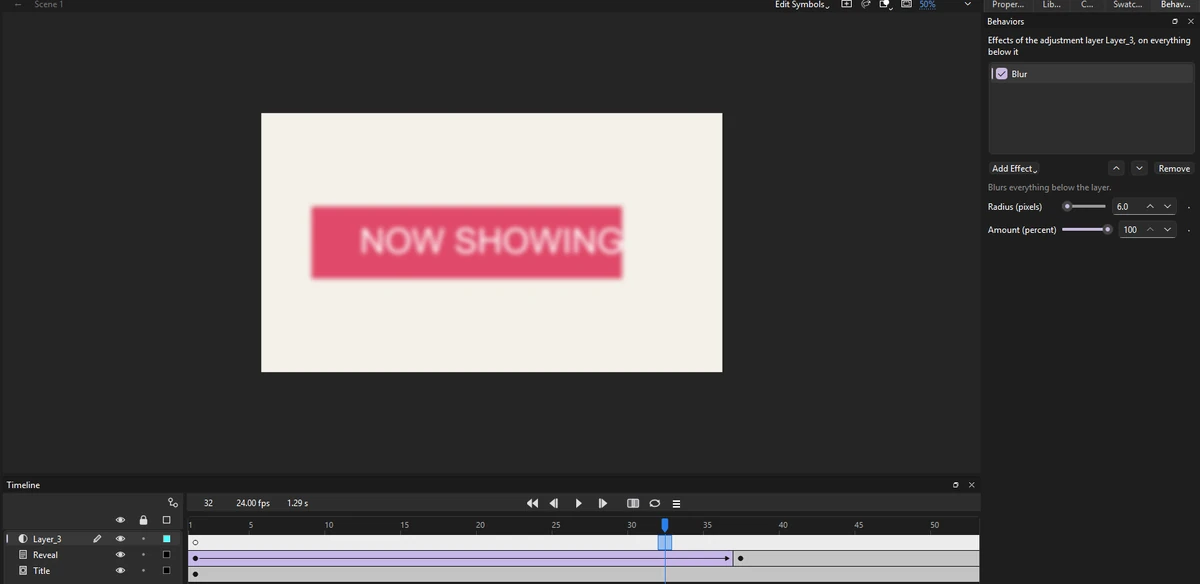
- Adjustment Layer makes a layer change everything drawn below it. With nothing selected on the stage, the Behaviors panel shows the current adjustment layer's effects: Add Effect offers Blur, Color Correction (brightness, contrast, saturation and hue), Tint (toward a color, keeping light and dark), Turbulent Displace (smooth random swirls that change over time: heat haze, water, a dream) and Wave Displace (waves traveling across the picture: a flag, a reflection), and many more (see Adjustment effects); their settings key like any others. An adjustment layer with no art changes the whole picture; one with art changes only where its art is, fading at soft edges.
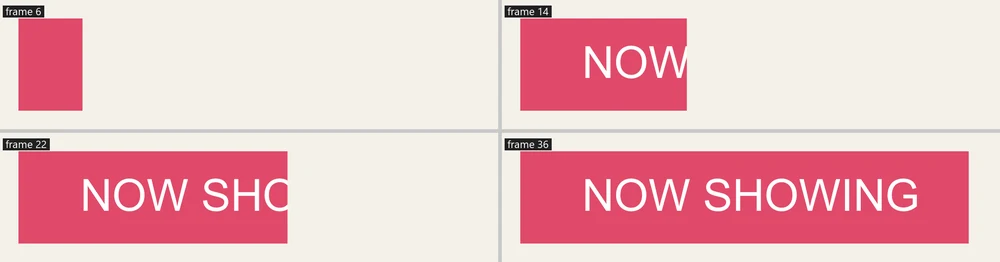

Both are Phoenix's own: another app opening the FLA file draws the matte layer plainly and the adjustment layer's art as art. Export FLA for Other Apps carries them as far as such apps allow:
- An alpha track matte becomes a mask over the layer, hard-edged; a luma matte the same, by the matte's shape rather than its light. An inverted matte puts the layer and its matte in a movie clip with Layer blending, the matte's art over the layer with Erase blending, so the art cuts the layer away, soft edges and all (an inverted luma matte cuts by the art's shape); the clip plays on its own when the movie plays.
- An adjustment layer's effects go on a movie clip holding the layers below it, as filters and a color effect, keyed a frame at a time where they change (see the list below). The movie clip plays on its own when the movie plays. Art on the adjustment layer becomes a mask over the filtered clip, with the clip unfiltered under both, so the effects reach only where the art is, hard-edged.
- When an effect has no counterpart, Phoenix draws the adjustment layer and everything below it into a bitmap on each frame, as the movie shows it, and puts the bitmaps on the layer, a keyframe only where the picture changes. The bitmaps are in a Baked effects folder in the library, and the layers themselves are kept in the movie clip Adjusted by the layer's name, unused, to edit or place again.
The effects carried as what other apps have:
| Effect | Becomes |
|---|---|
| Blur | A Blur filter |
| Directional Blur | A Blur filter on one axis, when it runs across or down (within 15 degrees) |
| Lens Blur | A Blur filter, when its highlight boost is 0 |
| Color Correction | An Adjust Color filter |
| Hue/Saturation | An Adjust Color filter (hue, saturation, and lightness as brightness), unless it colorizes |
| Glow | A Glow filter in its color, round the whole shape rather than its bright parts |
| Outline | A strong Glow filter, solid near the edge as the outline is |
| Tint, Fill | A tint color effect (Fill is a full tint) |
| Levels | A color effect, when its gamma is 1 and it narrows the range rather than stretching it |
| Wipes, Block Dissolve | Nothing at 0 percent, no alpha at 100; part way, a bitmap |
Only one color effect fits: a second one (or one on an instance that already has a color effect) is drawn into bitmaps. Every other effect, at a setting that changes anything, is drawn into bitmaps too.
The Output panel lists what was carried only in part.
Adjustment effects
An adjustment layer can have any number of these, applied top to bottom, each with an Amount where it makes sense; so can a single instance (see Effects on one instance). Generators and transitions are at their most useful with art on the layer: a Gradient Ramp then fills just that art, and a wipe takes away just what is under it.
| Effect | What it does |
|---|---|
| Blurs | |
| Blur | Blurs everything below evenly. |
| Directional Blur | Smears it along one direction, as fast motion would. |
| Radial Blur | Spins it about a point, or zooms it out from the point. |
| Lens Blur | Blurs as an out-of-focus lens does, bright points opening into round discs. |
| Glow | Makes the bright parts glow, in their own color or one you give. |
| Generators | |
| Gradient Ramp | A gradient between two points, linear or radial, painted over the picture or blended into it. |
| 4-Color Gradient | A soft blend of four colors, one at each corner. |
| Fill | Everything drawn below in one color, keeping its shape and soft edges. |
| Outline | An outline round everything drawn below, outside its edges. |
| Fractal Noise | Clouds of soft noise that can churn over time: smoke, fog, water, a texture, or a map for Displacement Map. |
| Distortion | |
| Turbulent Displace | Smooth random swirls that change over time: heat haze, water, a dream. |
| Wave Displace | Waves traveling across the picture: a flag, a reflection. |
| Bulge | Swells the picture round a point, or pinches it in. |
| Ripple | Rings of waves spreading from a point, as on water. |
| Bend | Bends the picture into a curve, across or down. |
| Displacement Map | Pushes the picture about by another layer, by name: its lighter parts push one way, darker the other. Hide the map layer to keep it out of sight; it still drives the push. |
| Color | |
| Color Correction | Brightness, contrast, saturation and hue. |
| Tint | Toward a color, keeping light and dark. |
| Levels | Black point, white point, gamma and the range shown. |
| Curves | Tones through a curve of input,output points, for all channels or one. |
| Hue/Saturation | Turns the hues, and sets how strong and how light the colors are; Colorize makes it all one hue. |
| Tritone | Darks, middles and lights mapped to three colors. |
| Vignette | Darkens toward the edges. |
| Grain | Film grain, still or changing every frame. |
| Chromatic Aberration | Pulls the red and blue apart, as a cheap lens or a glitch does. |
| Transitions | |
| Linear Wipe | Wipes the picture away behind a moving edge; key Completion from 0 to 100. |
| Radial Wipe | Wipes it away round a point like a clock hand. |
| Venetian Blinds | Wipes it away in stripes. |
| Block Dissolve | Dissolves it in random blocks. |
Effects on one instance
A symbol instance can have the same effects on its own picture, rather than on everything below a layer: an outline round one character, a glow on one sign, a ripple through one picture. Select the instance, click Effects at the top of the Behaviors panel (beside Behaviors), and use Add Effect as for an adjustment layer. With several instances selected, an effect added goes on each.
- The effects work on the instance as drawn with its color effect, before its filters, so a Drop Shadow falls from the outline an Outline adds.
- Positions in percent (a ramp's ends, a bulge's middle, a wipe's sweep) are across the box round the instance as it shows, so they move with it.
- Generators paint only on the instance's art: a Gradient Ramp or Fractal Noise fills its shape, a Vignette darkens its edges. Displacement Map reads another layer, so it does nothing on an instance.
- Settings key as an adjustment layer's do, on the frames of the timeline the instance is on.
They show on the stage, in Test Movie and in every export. In other apps the instance carries them as filters and a color effect, as in the list above; when one has no counterpart, the instance is drawn into a bitmap on each frame where it changes, in its place on its layer. Scripts and AI assistants set them with set_effects and "picture": true. The lesson Effects on one instance () walks through it.
Bake to keyframes
Baking turns behaviors into ordinary animation: each frame they touch becomes a keyframe holding the instance where its behaviors put it (frames where nothing changes are held from the keyframe before, so a keyframe stays only where something moves), its copies become instances of their own beside it, and the behaviors come off. What plays does not change, and you can then edit the frames by hand. Baking is one step you can undo.
- Bake in the Behaviors panel bakes the selected instances over all the keyframes they run through, and the selected shapes and text fields over their keyframes; a shape's operators are baked into drawing objects and a text's animators into a text field for each letter, a frame each. Baked shapes keep their look: a tapered line becomes its outline filled with the stroke's color or gradient, each dash stays a stroke of its own with the stroke's caps, and a gradient on a stroke or fill stays as it is placed.
- bakes the frames selected in the timeline.
Behaviors in saved files
Behaviors are Phoenix's own. They are saved with the instance in .phx and .fla files and come back when Phoenix opens the file. Another app that opens the FLA file shows the instances as they are keyed, without the motion behaviors add; when you save, Phoenix lists behaviors among the things such an app leaves out.
To hand the file to someone using another app, choose . It writes a copy (an .fla file or an XFL folder) with every behavior in the document baked into keyframes, so the other app plays the same motion. Your document itself keeps its behaviors.
Write your own behavior
You never need to write code to use behaviors, but you can make new ones in JavaScript. A behavior is a .js file in the Behaviors folder of your script configuration folder (beside the Commands folder). Phoenix reads the folder when it starts and again whenever a file there changes, so you can edit a behavior and watch the stage follow. The built-in behaviors are written the same way.
To start one, click Add Behavior and choose New Behavior...: Phoenix writes an example like the one below under the name you give and opens it in the script editor. Open Behaviors Folder shows where they are kept. The lesson Write your own behavior () walks through it.
behavior({
    name: "Drift",
    description: "Floats slowly to one side.",
    params: {
        speed: { label: "Pixels per second", value: 20, min: -500, max: 500 },
        bob: { label: "Bob (pixels)", value: 4, min: 0, max: 50 }
    },
    evaluate: function (ctx, p) {
        return {
            x: p.speed * (ctx.frame - ctx.start) / ctx.fps,
            y: Math.sin(ctx.time * 2) * p.bob
        };
    }
});
Each entry under params becomes a control in the Behaviors panel. Its type is "number" (the default, a slider from min to max by step), "angle", "checkbox", "choice" (with a choices list) or "seed"; value is where it starts and label what the panel calls it.
evaluate is called for each frame with the settings as p and what it needs to know as ctx:
| In ctx | What it is |
|---|---|
frame, time, fps | The frame (from 0), the time in seconds and the frame rate. |
start, end | The first and last frames of the run of keyframes the instance is on. |
keyed | What its keys give it now: x, y (its transformation point), rotation, scaleX, scaleY and alpha. |
keyedAt(frame) | The same on another frame of the run, or null. |
random(n), noise(t, n) | A number from 0 to 1, and a smooth one from -1 to 1 that changes with t; both follow the seed and differ from copy to copy, and n picks a separate stream. |
path | The motion guide's line, or null: its length, and at(distance), the x, y and angle there. |
other(name, frame) | Another instance on the timeline, by its instance name, as its keys and its own behaviors leave it (on this frame, or frame), or null. |
controller(name) | A master controller's value from 0 to 1, or null. |
parentAt(frame, x, y) | Where the layers it is parented to put the point (x, y) on a frame, as {x, y}: the world its keys live in. |
loudness(frame) | How loud the scene's sound is on this frame (or frame), from 0 for silence to 1 for its loudest moment. |
spectrum(frame) | The scene's sound on this frame as 32 bands from low notes to high, each from 0 to 1. |
waveform(frame) | The scene's sound's wave over this frame as 64 points, each from -1 to 1. |
control(holder, name) | A control on the instance named holder (see Controls on a null): a number, {x, y}, "#RRGGBB", or true or false; null when there is none. |
current | What the behaviors above it have done so far to this copy. |
copy, copies | Which copy this is, from 0, and how many there are, after the behaviors above it made them. |
It returns what to add: x and y in pixels, rotation in degrees, scale, scaleX and scaleY as factors (1 is no change), alpha as a factor, and frame, the frames a graphic's loop runs on by. Leave out what it does not change. To make copies, return { copies: [...] }, a list of those, one for each copy. Settings can be keyed in the panel, and p always holds their values on the frame being worked out. A file named like a built-in one (wiggle.js) takes its place.
Behaviors run on their own, away from the document: they cannot read files, the clock or anything but what ctx offers, and one that takes too long is stopped. That keeps every frame the same each time it is drawn. An error is shown in the Output panel, and the behavior adds nothing until it is fixed.